Audio Files
For Whisper, a .wav file can be used to perform ASR on. A basic setup to record from the player's microphone and save as a .wav file is as follows:
- Right click the content browser and create a new
Sound Submix. This will be for recording the player's microphone. - Open the submix by double clicking it and drag off the output of the submix you created to create another
Sound Submix. - Set the output volume for this newly created submix to
-96 dBto mute it.

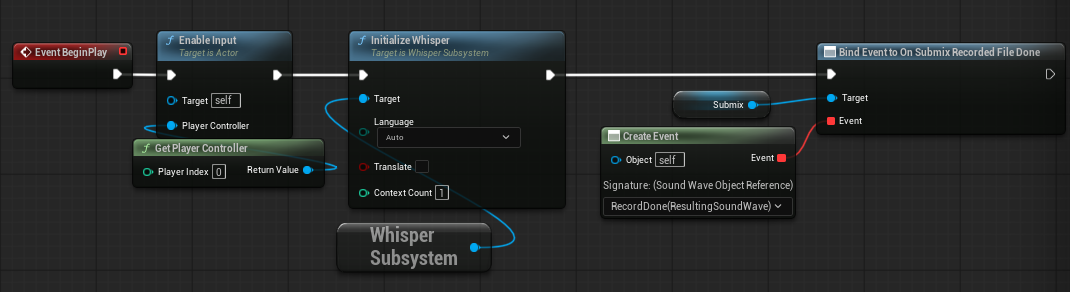
- Create a new Actor Blueprint and add an
Audio Capture Componentto it. - On the
Audio Capture Componentset theBase Submixto the first submix for recording you created. - If you have not initialized Whisper in another blueprint, you can do it in this actor from
Begin Play. - Get the player controller and
Enable InputonBegin Play - Create a new variable of type
Sound Submixand set it to the recording submix created earlier. - Get the submix in the blueprint and use the node
Bind Event to On Submix Recorded File Done. - From the event either use
Create EventorCustom Eventto define what occurs after recording. (note: Do not use the generated event from theEventssection on the submix variable)
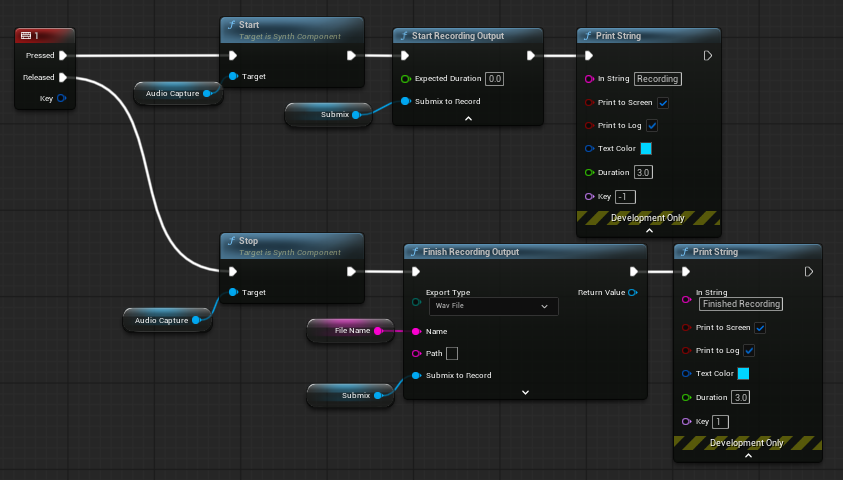
- Get the keyboard event for the desired input. On
Pressed, callStarton theAudio Capture Componentfollowed byStart Recording Outputon theSubmix. On released, callStopon theAudio Capture Componentfollowed byFinish Recording Outputon theSubmix. Set theExport Typeto Wav File andNameto the desired file name.
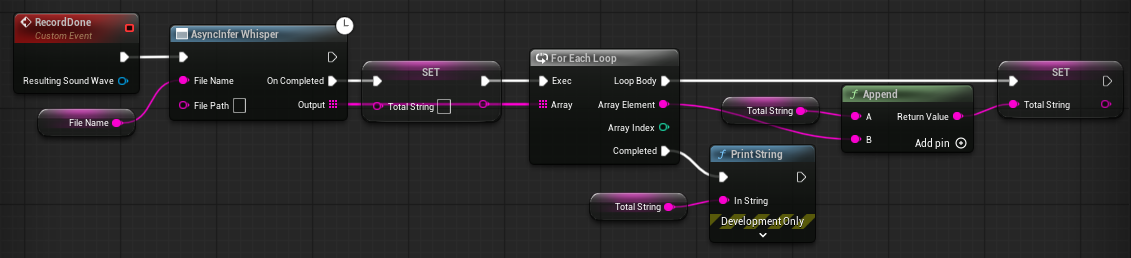
- From the event created when the submix recording is finished, call the
AsyncInfer Whispernode. SetFile Nameto the same file name asFinish Recording Output. Perform actions on the output as required.
- Create an instance of the blueprint in a level and press and hold the assigned button to record the microphone and release to transcribe the audio using Whisper.